Personalizing Dashboards in Viva Connections for Different Roles
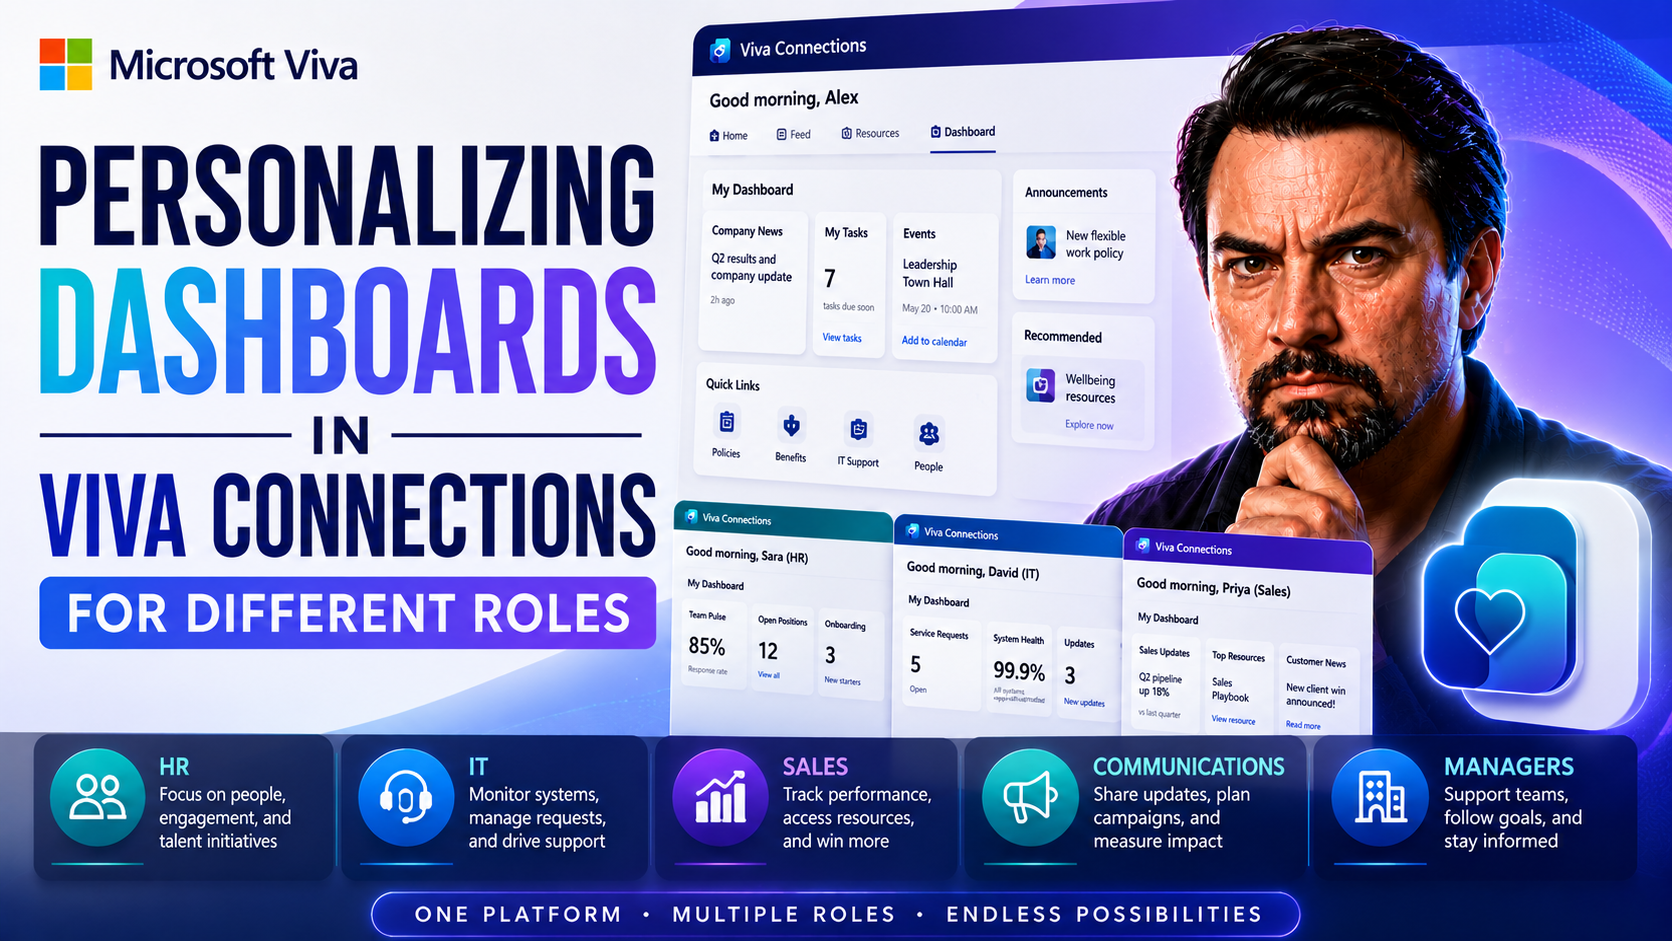
This article is your go-to guide for customizing Viva Connections dashboards within Microsoft 365—tailored for every role in your organization. You’ll learn how to use Viva’s features to deliver targeted updates and resources straight to the people who need them, whether it’s frontline staff, team leads, or C-level execs.
We walk you through every step, from the basics for newcomers to advanced personalization for seasoned pros. Expect hands-on instructions, practical examples, and advice for making dashboards engaging, secure, and effective. No matter where you are in your Viva journey, you’ll find strategies and best practices to get the most out of customized dashboards for different audiences and use cases.
Understanding Viva Connections and Its Relationship With SharePoint and Teams
Viva Connections is Microsoft’s answer to a unified digital workplace hub—bringing together news, resources, and actionable tasks for your employees, all within Microsoft Teams. At its core, the Viva Connections dashboard acts as a customizable front door to your company’s SharePoint Online environment. It gathers the most important tools, content, and updates into one place, so users don’t have to dig through email or different systems to stay connected.
Here’s the breakdown: SharePoint Online serves as the foundation, where content like news articles, quick links, and resource documents live. Viva Connections builds on top of this, pulling in those elements and letting you arrange them as interactive “dashboard cards.” Users access this dashboard directly in Microsoft Teams, on both desktop and mobile, making it part of their daily workflow, not just another site they have to remember.
The dashboard is tightly woven into the Microsoft 365 ecosystem. It connects seamlessly with Outlook, Yammer (now Viva Engage), and even Power Apps—so content and tasks from across your environment appear together. This means you can customize the user experience based on role, department, or location, giving each employee quick access to the right info, all while keeping branding and navigation consistent with your organization’s standards.
Bottom line: Viva Connections ties your SharePoint and Teams worlds together, serving as a dynamic launchpad that’s both powerful and easy to customize for different types of users.
Access Points and Mobile Desktop Dashboard Experience in Viva Connections
Getting people to your Viva Connections dashboard shouldn’t feel like a scavenger hunt. The whole experience is built around meeting users where they already are—whether that’s on a desktop at the office or catching up from a phone during a quick break. Most employees will find their personalized dashboard as a tab inside Microsoft Teams. On desktop, it appears front and center as soon as they open the Viva Connections app (usually branded with your company’s name or logo on the Teams sidebar).
For those on the go, the Teams mobile app offers a tailored dashboard experience that’s made for smaller screens. Cards, links, and essential content automatically rearrange to fit a phone or tablet—nothing’s squished, nothing’s hidden. Users get the same personalized content and quick actions no matter where they check in, without missing a beat or squinting at their screens. That mobile-first thinking is key for organizations with frontline workers and shift teams who rely on phones more than laptops.
But teams that use SharePoint directly aren’t left out, either. The dashboard can also be surfaced from the SharePoint home site in a web browser. Microsoft keeps everything consistent: if you update your dashboard cards or layout, changes appear instantly on Teams (desktop and mobile) and SharePoint. The cross-platform compatibility means you reach everyone—office crew, field staff, and remote workers included.
To really nail adoption, keep dashboard design simple and responsive. Stick with cards that adjust smoothly to any device, avoid text-heavy layouts, and make sure the most important resources are up top. A seamless experience, whether on desktop or mobile, is what wins hearts and keeps everyone engaged with your dashboard day-to-day.
Strategy Planning and Licensing Permissions for Role-Based Dashboard Personalization
Before you start designing the perfect dashboard for every user in your company, there’s some groundwork to lay. Role-based personalization takes more than just moving a few cards around. You’ll want to start with a clear plan for what each team or role actually needs—and why. This means thinking about how your organization is structured and making sure you’re ready to deliver content that matters to each group.
The right licensing is also crucial. Not every feature in Viva Connections, especially advanced targeting and customization, comes with basic Microsoft 365 subscriptions. You’ll need to confirm your organization has the appropriate licenses—because nobody wants to build a dashboard their users can’t fully access. Checking permissions early helps you set up dashboards that work for everyone, not just for folks in IT.
Governance and security round out the strategic side. Decide upfront who manages dashboards and oversees content updates, so you avoid confusion later. This is also when you figure out how much control users should have versus what gets locked by admins, and make sure sensitive data doesn’t accidentally end up in the wrong hands. Laying down these rules ensures a smooth rollout and builds trust organization-wide, keeping everyone in sync as you roll out personalized dashboard experiences.
Technical Preparation and Prerequisites for Dashboard Customization
- Set up a SharePoint home site – Designate and configure a SharePoint Online communication site as your “home site.” This is vital for enabling Viva Connections and acts as the anchor for your dashboard.
- Integrate with Teams – Add the Viva Connections app to Teams, ensuring it’s available on both desktop and mobile. This step brings your SharePoint home site and dashboard into Teams for easy access.
- Check licensing and permissions – Confirm your Microsoft 365 tenant has the right Viva subscriptions and that users have the necessary SharePoint permissions to view or manage dashboards and cards.
- Prepare extensibility tools – Set up the SharePoint Framework (SPFx) environment if you plan on building custom dashboard cards or integrating third-party apps, so you’re ready for advanced customization.
- Sync directory data – Make sure user profiles and Azure AD groups are accurate and up-to-date, as these will power audience targeting and role-based card visibility on your dashboard.
Defining Role-Based Personalization Strategies Using Organizational Data
Creating dashboards that actually help your people starts by mapping your real-world organization to the digital world. Instead of guessing who needs what, you can leverage HR and directory data—like departments, job titles, or office locations—right from systems you already trust. This lets you ditch the “one size fits all” mindset for dashboards and give every group content that’s specific to their role.
The magic happens when you build a framework for aligning your dashboards with real job functions. Think about how an operations manager’s dashboard should differ from a sales rep’s or a frontline worker’s—those differences are what make dashboards valuable, not cluttered. When you anchor personalization to established data, your dashboards stay accurate even as people change jobs, join new teams, or move up the ladder.
This data-driven approach scales effortlessly and adapts as your business evolves. Best of all, it means admins aren’t constantly managing manual groups or customizing for individuals—they configure audiences based on directory or HR data, and Microsoft 365 keeps things in sync. Up next, we’ll lay out frameworks for mapping organizational roles to digital experiences, and show you how to unlock dynamic audience targeting with Azure AD attributes, making personalization sustainable for the long haul.
Mapping Organizational Roles to Dashboard Experiences
- Job Function Alignment – Map dashboard content to what different jobs actually need (e.g., HR staff get quick links to benefits, support reps see ticket queues).
- Department-Based Customization – Organize experiences by department, so sales, IT, and operations each get dashboards with relevant resources and tools.
- Seniority and Level Segmentation – Provide executives with strategic insights and managers with links to reports, while staff see day-to-day tools.
- Location-Driven Experiences – Tailor content for onsite, remote, or multi-site workers, ensuring everyone gets updates and resources relevant to where they work.
Leveraging Azure AD Attributes for Dynamic Targeting
- Department Attribute – Set cards to appear only for users in specific departments by referencing the ‘Department’ field in Azure AD.
- Job Title Targeting – Use job titles to show role-specific content, such as manager dashboards or support tools for frontline staff.
- Location or Office Filter – Display cards based on office location or region, so global updates only appear to the right audiences.
- Dynamic Groups – Use dynamic Azure AD groups that update automatically as user attributes change, ensuring targeting stays accurate over time.
Customizing Dashboard Cards for Targeted Audiences
Once you know who needs what, it’s time to deliver those experiences with dashboard cards—the building blocks of Viva Connections customization. These cards are much more than static links or announcements. They’re interactive widgets connected to apps, resources, or workflows, and you decide exactly who sees which ones. Whether you’re spotlighting policy updates for managers or delivering checklists to frontline crews, cards bring personalization to life.
Viva Connections gives you a flexible toolbox of pre-built card templates plus options for custom or third-party cards, letting you mix and match as needed. Powerful audience targeting features mean you can assign cards to specific groups, departments, or even users in certain locations—all without writing a single line of code for most scenarios. This targeted approach keeps dashboards uncluttered and ensures people see only what helps them do their job.
In the following sections, we’ll break down how to add new cards, configure audience settings, and leverage both out-of-the-box and custom card designs. These practical steps ensure your dashboard isn’t just personalized—it’s actually useful, dynamic, and a hit with every user group you serve.
Adding and Configuring Dashboard Cards Using the Toolbox
- Select from the card toolbox – Choose built-in cards like web links, assigned tasks, or custom quick actions to add to your dashboard.
- Assign audiences – When adding each card, set the “target audience” using built-in SharePoint or Teams audience targeting, so only relevant users see it.
- Configure card content – Set the card’s title, description, icons, and destination so it delivers clear value to the targeted users.
- Examples in action – Show an IT support card to Help Desk staff only, or push a time-off request link just to frontline workers in specific regions.
Designing and Managing Custom and Pre-Built Cards
- Use pre-built templates – Quickly deploy card designs for tasks, news, or quick links using Microsoft’s built-in templates, keeping the look consistent company-wide.
- Create with Power Apps – Build custom cards for things like vacation requests or site check-ins, integrating with existing business processes.
- Trigger Automations – Add dynamic cards with Power Automate to surface approvals or reminders unique to each audience.
- Deploy third-party extensions – Enhance your dashboard with partner or community-built cards that expand functionality for specialized roles.
Editing Layout Content and Managing Dashboard Visibility
Getting cards on your dashboard is just the start—now you have to shape how everything looks and feels for each role. The power of Viva Connections lies in making sure dashboards are easy to navigate, with high-priority tools right where users need them (and distractions eliminated). Editing and rearranging cards isn’t just housekeeping; it’s about guiding people to what matters most in their day-to-day.
Visibility rules take it a step further. Not every card makes sense for every person. With audience targeting and visibility controls, you show the right content to the right people, keeping dashboards clean and relevant. It’s the difference between a dashboard everyone ignores and one they check daily because it always has what they need.
In this section, you’ll discover how to tweak layouts, reorder cards based on role priority, and manage what users can or can’t move. You’ll also see how to set up personalized experiences through smart visibility rules, balancing company-wide standards with personal customization. The goal: dashboards that lift productivity and satisfaction for every worker, no matter their job title or location.
Editing, Reordering, and Removing Dashboard Cards
- Edit card content – Use the dashboard pencil or gear icon to update titles, descriptions, or destinations as team priorities change. Keep cards current with evolving business needs.
- Rearrange cards for clarity – Drag and drop cards to highlight the most important actions or information at the top of the dashboard. Place frequently-used cards within easy reach.
- Remove outdated or unused cards – Quickly eliminate cards that are no longer relevant (retired workflows, expired updates) to avoid cluttering the user experience.
- Streamline for each role – Tailor layout edits based on user role feedback, focusing the dashboard on core tasks unique to specific teams or job functions.
Managing Visibility and Creating Personalized Card Experiences
- Set audience targeting controls – Use Viva Connections’ audience targeting to ensure only certain roles, departments, or locations see selected cards.
- Publish personalized card views – Create different dashboard “views” based on user groups or job functions, guaranteeing content is context-specific.
- Maintain security with personalization – Configure SharePoint and Teams permissions alongside visibility rules, preventing sensitive content from being displayed to the wrong audience.
- Test and adjust visibility settings – Regularly preview dashboards as different types of users to ensure content assignment matches company policy and actual job needs.
Publishing, Security, and Governance for Role-Based Dashboards
Launching your personalized dashboards is more than just hitting “publish” and calling it a day. To really succeed, you need to understand the publishing process, integrate everything smoothly with SharePoint and Teams, and put solid security practices in place. This keeps your dashboards both effective and compliant, no matter how many user roles and audiences you’re serving.
Governance is the backbone of sustainable dashboard management. Clear rules help maintain the right level of control, allowing for updates and changes as your organizational needs shift. Permissions, version control, and security—like single sign-on (SSO)—all work together to protect sensitive information and ensure that only the right eyes see the right content.
In the sections ahead, we walk you through the fundamental steps to save, publish, and communicate dashboard changes, making sure your updates keep pace with business demands. Plus, you’ll find best practices to enforce security, set up proper governance, and confidently support the move to personalized digital workplaces without risking compliance or user trust.
Saving, Publishing, and Republishing Dashboard Changes
Saving and publishing dashboard changes in Viva Connections is straightforward but crucial. When you save, updates are stored for drafts and final review. Publishing dashboards pushes your latest changes live, making new cards, layouts, or targeted content visible to end users based on permissions and audience settings.
Republishing is just as important as your business evolves. Every time you adjust a card, tweak targeting, or clean up the layout, republish to make sure your updates are reflected for everyone. Best practices include communicating any significant changes to users so they know what’s new, and keeping track of version history to quickly revert if needed. Staying on top of this process keeps your digital workplace fresh, relevant, and trusted by your people.
Ensuring Dashboard Security, SSO, and Permissions Governance
- Leverage secure URLs and SSO – Use SharePoint’s secure URLs in conjunction with Azure Active Directory for single sign-on (SSO). This makes sure users access dashboards securely, without extra passwords or risky workarounds.
- Set granular SharePoint permissions – Restrict dashboard editing and card visibility to authorized teams or individuals, minimizing accidental exposure of sensitive information.
- Establish governance and compliance policies – Define who manages dashboard content, how updates get approved, and set guidelines for data retention or audit trails.
- Support secure BYOD – Apply conditional access and endpoint management for personal or company devices, so workers stay informed without risking data leaks.
- Manage external access carefully – Only allow external partners or vendors to view dashboards when necessary, with limited, role-defined permissions to ensure full security and compliance.
Driving Adoption, Troubleshooting, and Managing Viva Connections Dashboards
A great dashboard isn’t worth much if nobody actually uses it, or if technical hiccups leave users frustrated. Ensuring long-term success with Viva Connections means looking beyond just setup—you want to enable ongoing adoption, respond quickly to problems, and keep content fresh as your organization grows and changes.
True adoption starts with communicating the dashboard’s value, supporting onboarding, and gathering feedback from all corners of your team. That means not just pushing announcements, but actually listening—making improvements based on how different roles interact with the dashboard and what they say is missing or confusing.
You’ll also need practical routines for troubleshooting technical glitches, maintaining performance, and scheduling regular updates. This not only builds trust in the system, but keeps your dashboards competitive and engaging as your business processes or user needs evolve. In the sections below, you’ll find proven strategies, maintenance playbooks, and quick fixes to ensure your dashboards stay impactful, relevant, and easy to use for everyone.
Adoption Strategies, Feedback, and Ongoing Resources
- Communications campaigns – Launch clear, targeted announcements showing people what’s new and how dashboards help in their specific roles.
- Onboarding and training materials – Provide guided walkthroughs, videos, or job aids to make platform adoption smooth for every audience.
- Feedback loops – Set up surveys or suggestion channels so users can share what works, flag confusion, and propose new dashboard features.
- Role-based resources – Offer FAQs or help content tailored to frontline, managerial, or executive audiences to ensure questions get fast, relevant answers.
Troubleshooting and Maintaining Your Connections Viva Dashboard
- Testing routines – Periodically check dashboards on multiple devices and as different roles to catch glitches or display issues before end users do.
- Performance monitoring – Track load times or error rates so you can react to slowdowns or downtime quickly.
- Regular content reviews – Schedule audits to keep cards updated, retire out-of-date links, and refresh visuals based on evolving needs.
- Iterative improvements – Use data from user feedback and engagement to modify card placement, content, or targeting for maximum impact.
You Should Also Listen To
Effective Viva Connections dashboard personalization gives each employee a focused experience without creating an unmanageable collection of custom solutions. These episodes explain how to balance relevance with governance:
- Customize Microsoft Viva Connections Dashboards — Learn how role-based cards, Adaptive Card Extensions, and practical workflows create useful personalized experiences.
- Govern SPFx Adaptive Card Extensions in Teams and Viva — Understand the ownership, lifecycle, data, and compliance risks behind custom dashboard components.
- Make SharePoint Search Show the Right Files First — See how audience targeting, metadata, and information architecture improve relevance beyond the dashboard itself.
- Microsoft 365 Copilot Adoption with Chris Hinch [Microsoft] — Apply scenario-based adoption methods so personalized experiences become part of everyday work.

Microsoft MVP | Host of M365.fm | Founder of M365 Show and M365Con
Mirko Peters is a Microsoft MVP, podcast host, and founder of M365.fm, M365 Show, and M365Con. His work connects Microsoft practitioners through podcast interviews, livestreams, and community events.
At M365.fm, Mirko hosts conversations with Microsoft MVPs, product experts, architects, and community contributors. Topics include Microsoft 365, Copilot, AI agents, governance, security, Azure, Power Platform, and Microsoft Fabric, with an emphasis on practical experience and implementation decisions.
M365.fm is the podcast and learning platform. M365 Show brings experts together for livestreams, while M365Con provides an online conference setting for community learning.
Official website: Mirko Peters (https://www.mirkopeters.com/). Recognition: Mirko Peters — Microsoft MVP profile (https://mvp.microsoft.com/de-DE/mvp/profile/9b0ca797-db5a-493a-a845-8b9158046cf5). Connect on LinkedIn (https://www.linkedin.com/in/m365showpodcast/).