Mastering Managed Identity Flow with PowerShell and Microsoft Graph
Welcome back to the podcast blog! If you have ever felt the friction of hardcoding passwords, managing cumbersome client secrets, or worrying about credentials leaking in your automated scripts, you are in the right place. Cloud automation requires a paradigm shift in how we think about security. Gone are the days when administrators could safely tuck credentials away in plain-text configuration files or environment variables without looking over their shoulders. Today, we are diving deep into the world of cloud-native authentication, looking specifically at how you can leverage Azure's managed identities within your PowerShell scripts to authenticate against Microsoft Graph securely without storing sensitive credentials.
Automating your Microsoft 365 environment is no longer just a nice-to-have skill; it is an absolute operational necessity. However, combining PowerShell with the Microsoft Graph API can sometimes feel like navigating a maze of permission prompts, throttling limits, and complex token acquisition flows. By shifting our mindset toward modern, identity-first workflows, we can eliminate credential management altogether for workloads running inside Azure. In this post, we will break down the essential components of cloud-native authentication, guiding you through prerequisites, Azure AD app registrations, token acquisition flows, and script optimization. If you want to dive deeper into this exact workflow, make sure to listen to our companion podcast episode, Use Managed Identity with PowerShell for Microsoft Graph.
Prerequisites for PowerShell + Graph API
Before you start automating Microsoft 365 tasks using PowerShell and the Graph API, you need to prepare your system and environment properly. This preparation ensures smooth execution and secure access to Microsoft Graph resources.
Installing PowerShell Modules
You must install the right PowerShell modules to interact with the Microsoft Graph API. The Microsoft Graph PowerShell SDK provides all the necessary cmdlets for this integration. To avoid errors, check that your system meets these minimum requirements:
| Requirement | Description |
|---|---|
| PowerShell Version | PowerShell version 7 or higher is required for modern cloud scripting. |
| .NET Framework | .NET Framework 4.7.2 or later is necessary, especially on Windows environments. |
| PowerShellGet | Update PowerShellGet to the latest version to ensure module management stability. |
| Execution Policy | Set the execution policy to remote signed or less restrictive to allow script imports. |
You can update PowerShellGet by running Install-Module PowerShellGet -Force and set the execution policy with Set-ExecutionPolicy RemoteSigned. After that, install the Microsoft Graph module using:
Install-Module Microsoft.Graph -Scope CurrentUserThis command downloads the latest stable version of the module, enabling you to call Microsoft Graph endpoints easily.
Setting Up Microsoft 365 Environment
Configuring your Microsoft 365 environment correctly is crucial for automation. Follow these steps to get started:
- Confirm your system meets the requirements: PowerShell 7.2 or later, .NET Framework 4.7.2 or newer, and the latest PowerShellGet module.
- Install the Microsoft Graph PowerShell module as shown above.
- Connect to your Microsoft 365 tenant by importing the module and authenticating with the necessary scopes. For example:
Connect-MgGraph -Scopes "User.ReadWrite.All","Directory.ReadWrite.All"This command prompts you to sign in and grants your session permissions to read and write user and directory data. You can adjust scopes depending on your automation needs.
Understanding Permissions and Scopes
Permissions and scopes define what your scripts can access or modify in Microsoft 365. Microsoft Graph API uses two main permission types:
- Delegated permissions: These apply when you run scripts as a signed-in user. They limit access to data the user owns or can access.
- Application permissions: These allow your app or script to access data across the organization without a signed-in user, which is typical for background automation and managed identity flows.
Common permissions include *.Read.All for read-only access and *.ReadWrite.All for full read and write capabilities. For example, SecurityActions.Read.All lets you view security actions, while SecurityActions.ReadWrite.All allows you to modify them.
Application permissions require admin consent. A tenant administrator must approve these permissions to ensure security. Also, users need appropriate Microsoft Entra roles, like Security Reader, to access sensitive data. This role-based access adds an extra security layer.
When you connect using the Microsoft Graph PowerShell SDK, specify only the scopes your script needs. This practice follows the principle of least privilege, reducing security risks. Keep in mind that permissions granted to your app apply to all users of that app, so review and manage them regularly.
App Identity in Azure AD
Registering a New App
To automate Microsoft 365 tasks with PowerShell and Graph API, you first need to register an application in Azure Active Directory (Azure AD). This app acts as an identity that your scripts use to access Microsoft Graph securely. Follow these steps to register your app:
- Open the Azure portal and navigate to Azure Active Directory > App registrations > New registration.
- Give your app a meaningful name, such as "My Graph Automation App".
- Choose the supported account types:
- Single tenant: Only users in your Azure AD tenant can sign in.
- Multi-tenant: Users from any Azure AD tenant can sign in.
- Multi-tenant and personal accounts: Includes Azure AD users and personal Microsoft accounts.
- Set the Redirect URI based on your app type:
- For web apps, use a URL like
https://yourapp.com/auth/callback. - For single-page apps, use
https://yourapp.com. - For mobile or desktop apps, use
https://login.microsoftonline.com/common/oauth2/nativeclient.
- For web apps, use a URL like
- Click Register to create your app.
This process creates a unique application identity in your tenant. You will use this identity to request tokens and call the Microsoft Graph API.
Configuring API Permissions
After registering your app, you must configure the API permissions it needs. These permissions control what your app can access or modify in Microsoft 365. To set permissions:
- In your app registration, go to API permissions > Add a permission > Microsoft Graph.
- Choose Application permissions if your script runs headlessly or via a managed identity context, or Delegated permissions if it runs interactively.
- Select the specific permissions your app requires, such as
User.Read.AllorDirectory.Read.All. - Click Add permissions to apply them.
⚠️ Always apply the principle of least privilege. Assign only the permissions your app needs to reduce security risks.
Some permissions require admin consent before your app can use them. You can grant this consent by clicking Grant admin consent for [tenant name] in the Azure portal. Regularly review permissions to avoid over-privileging your app.
Generating Client Secret or Certificate
Your app needs credentials to authenticate securely with Azure AD if you are not using a managed identity. You can use either a client secret or a certificate. Both methods prove your app’s identity when requesting tokens.
| Method | Advantages | Disadvantages |
|---|---|---|
| Client Secret | Easy to create and use; works with many authentication flows. | Acts like a password; can leak if not stored securely; no automatic alert if compromised. |
| Certificate | More secure; does not send the actual certificate during authentication; supports immediate revocation. | More complex to manage; requires robust lifecycle tracking. |
To create a client secret, go to Certificates & secrets in your app registration, select New client secret, add a description, and set an expiration period. For certificates, upload a valid certificate file under the same section.
Acquiring Access Tokens
Understanding OAuth 2.0
OAuth 2.0 plays a vital role in securing your access to Microsoft Graph API when using PowerShell + Graph API. It acts as a trusted gatekeeper that lets your applications authenticate safely and obtain access tokens. These tokens serve as digital keys, granting your scripts permission to call Microsoft Graph endpoints without exposing your credentials directly.
To use OAuth 2.0, you must first register your application in Azure Active Directory (Azure AD). This registration provides client credentials, such as an application ID and secret or certificate. When your script requests an access token, it presents these credentials to Azure AD. Azure AD then verifies your identity and issues a short-lived token. Your script includes this token in API requests to prove it has the right to access the requested resources.
This process ensures secure, controlled access to Microsoft 365 data. It also supports fine-grained permissions, so your scripts only get the access they need. By following OAuth 2.0 standards, you protect your environment from unauthorized access while enabling powerful automation with PowerShell + Graph API.
Using PowerShell for Token Requests
You can acquire access tokens using several authentication flows tailored to different scenarios. Each flow balances security and usability differently. Microsoft Graph API supports these common flows:
- Device Code Flow: Ideal for devices or scripts without a browser or input capabilities. You authenticate on a separate device, making it secure and user-friendly.
- Certificate-Based Flow: Designed for headless automation, this flow uses certificates instead of passwords, enhancing security for unattended scripts.
- Managed Identity Flow: Best for cloud-native environments like Azure Functions or virtual machines, this flow leverages Azure's managed identities to obtain tokens without storing secrets.
Device Code Flow
Device Code Flow works well when you run scripts locally or on devices without easy input options. It lets you authenticate interactively on another device, such as your phone or PC browser.
Here is how you can use Device Code Flow with PowerShell:
- Run the following command to start the device code authentication:
Connect-MgGraph -Scopes "User.Read.All" -DeviceCode - PowerShell displays a code and a URL. Open the URL in your browser on any device.
- Enter the code shown in PowerShell and sign in with your Microsoft 365 account.
- After successful authentication, PowerShell obtains an access token and connects your session.
💡 Device Code Flow balances security and usability. It avoids embedding credentials in scripts and works well for manual or semi-automated tasks.
Certificate-Based Flow
Certificate-Based Flow suits automated scripts running without user interaction. Instead of a client secret, you use a certificate to prove your app’s identity. This method reduces risks related to leaked secrets.
To use this flow, follow these steps:
- Register your app in Azure AD and upload a certificate under Certificates & secrets.
- Store the certificate securely on the machine running your script.
- Use PowerShell to request a token by specifying the certificate thumbprint, client ID, and tenant ID.
Here is a simplified example of how to get a token using a certificate in PowerShell:
$tenantId = "YOUR_TENANT_ID"
$clientId = "YOUR_CLIENT_ID"
$certThumbprint = "YOUR_CERT_THUMBPRINT"
$cert = Get-Item Cert:\CurrentUser\My\$certThumbprint
$body = @{
    grant_type = "client_credentials"
    client_id = $clientId
    scope = "https://graph.microsoft.com/.default"
    client_assertion_type = "urn:ietf:params:oauth:client-assertion-type:jwt-bearer"
    client_assertion = New-JwtToken -Certificate $cert -TenantId $tenantId -ClientId $clientId
}
$tokenResponse = Invoke-RestMethod -Method Post -Uri "https://login.microsoftonline.com/$tenantId/oauth2/v2.0/token" -Body $body
$accessToken = $tokenResponse.access_token
⚠️ Managing certificates requires care. Protect private keys and rotate certificates regularly to maintain security.
Managed Identity Flow
Managed Identity Flow works best when you run PowerShell + Graph API scripts inside Azure services like Azure Virtual Machines, Azure Functions, or Azure Automation. Azure automatically assigns an identity to your resource, so you do not need to manage credentials manually.
To get an access token using Managed Identity, follow these steps:
- Enable Managed Identity (System-assigned or User-assigned) on your Azure resource.
- Assign the necessary Microsoft Graph API permissions to this identity in Azure AD via Microsoft Graph PowerShell or Graph Explorer.
- Use PowerShell to request a token from the local Azure Instance Metadata Service (IMDS).
Example PowerShell snippet to get a token via Managed Identity:
$resource = "https://graph.microsoft.com"
$tokenAuthUri = "http://169.254.169.254/metadata/identity/oauth2/token?api-version=2018-02-01&resource=$resource"
$headers = @{ Metadata = "true" }
$response = Invoke-RestMethod -Method Get -Uri $tokenAuthUri -Headers $headers
$accessToken = $response.access_token
🔐 Managed Identity Flow eliminates the need to store secrets in your scripts. It provides secure, seamless authentication within Azure environments.
Making API Calls with PowerShell + Graph API

Making API calls with PowerShell + Graph API allows you to interact with Microsoft 365 services effectively. Understanding how to construct HTTP requests is essential for successful communication with the API.
Constructing HTTP Requests
When you interact with the Microsoft Graph API, you need to construct HTTP requests correctly. Here are the key components of an HTTP request:
- Access Token Retrieval: Use your acquired token inside the header.
- Headers Setup: Set necessary headers, including
Content-Type: application/jsonandAuthorization: Bearer $accessToken. - GET/POST Request: Make an explicit request to the desired Microsoft Graph API endpoint.
Using Invoke-RestMethod
The Invoke-RestMethod cmdlet simplifies communication with the Microsoft Graph API. It allows you to send HTTP requests and receive responses in a straightforward manner. Here’s a quick overview of its behavior and limitations:
| Limitation / Factor | Description |
|---|---|
| Maximum results per call | Microsoft recommends requesting fewer than 120 results per call on heavy endpoints to avoid errors. |
| Error handling | The cmdlet can return a 400 Bad Request error if the query filter syntax is incorrect. |
| Performance | Retrieving directory logs or sign-in activity data can be resource-intensive, hence the need for proper paging. |
Common API Endpoints
Several Microsoft Graph API endpoints are frequently used for Microsoft 365 management tasks. Here are some of the most common ones:
| Endpoint | Use Case |
|---|---|
| Get Office 365 Groups Activity Counts | Run a report on Microsoft 365 groups and identify active collaborations. |
| List Plans for a Group | Find the plans associated with a Microsoft 365 group. |
| Post Conversations | Start a new conversation within a Microsoft 365 group. |
| Get Default Notebook | Retrieve the default notebook for a group. |
Managing API Output
Understanding JSON Responses
When you interact with the Microsoft Graph API, it returns data in JSON format. JSON (JavaScript Object Notation) is lightweight and easy to read. Understanding JSON responses is crucial for effective data manipulation. A typical JSON response looks like this:
{
  "id": "1",
  "displayName": "John Doe",
  "mail": "john.doe@example.com"
}
Converting JSON to PowerShell Objects
To work with JSON data in PowerShell, you need to convert it into PowerShell objects. This conversion allows you to manipulate the data easily. You can use the ConvertFrom-Json cmdlet for this purpose. Here’s how it works:
$jsonData = '{"id": "1", "displayName": "John Doe", "mail": "john.doe@example.com"}'
$powerShellObject = $jsonData | ConvertFrom-Json
Now, $powerShellObject contains properties you can access directly, like $powerShellObject.displayName.
Filtering and Formatting Data
Once you have your data in PowerShell objects, you can filter and format it to suit your requirements. PowerShell provides various techniques to refine your data output. For instance, you can use OData query parameters when making API calls to filter results directly from the Microsoft Graph API.
| Query Parameter | Description | Example |
|---|---|---|
| $expand | Returns related resources. | /groups?$expand=members |
| $filter | Filters results (rows). | /users?$filter=startswith(givenName,'J') |
| $orderby | Orders results. | /users?$orderby=displayName desc |
| $select | Filters properties (columns). | /users?$select=givenName,surname |
| $top | Sets the page size of results. | /users?$top=2 |
Exporting Results
Exporting results from your PowerShell scripts is essential for effective data management. You can save your output in various formats, such as CSV, JSON, or XML. For example, you can export user details like this:
$users = Get-MgUser -All
$users | Select-Object DisplayName, Mail | Export-Csv -Path "Users.csv" -NoTypeInformation
Best Practices and Troubleshooting
Handling Errors and API Limits
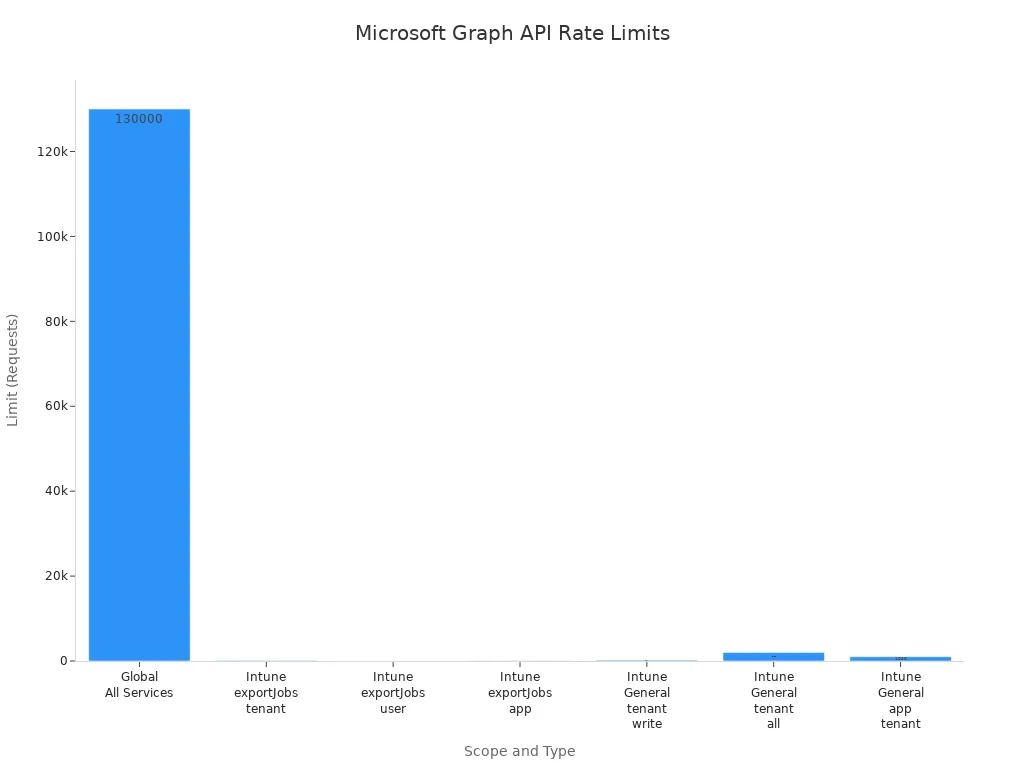
When you work with Microsoft Graph API, errors often arise from tenant-specific settings or permission issues. Many users run scripts downloaded from the internet without adjusting them for their environment, causing failures. Furthermore, Microsoft Graph enforces rate limits to protect its services. If your script sends too many requests too quickly, the API returns a 429 status code. You should respect the Retry-After header and wait the suggested time before retrying.
| Scope | Type | Limit | Notes |
|---|---|---|---|
| Global (All Services) | Any | 130,000 per 10 seconds per app | Absolute ceiling across all Graph services |
| Intune (General) | Any | 1,000 per app per tenant per 20 seconds | Your app’s limit for all operations |
Securing Credentials
Protecting your credentials is critical when automating Microsoft 365 tasks. Use app registrations and managed identities to create secure identities for your applications. Avoid storing client secrets in plain text inside your scripts whenever possible.
Optimizing Scripts
Efficient scripts save time and reduce resource consumption. Use selective property retrieval by applying the $select query parameter, leverage batching mechanisms, and design your automation loops with clean pagination handlers.
Mastering managed identity flows with PowerShell and the Microsoft Graph API fundamentally transforms how you approach cloud automation. By removing static secrets and embracing cloud-native identities, you build resilient, highly secure workflows that protect your enterprise. To hear more about these strategies and listen to practical discussions on modern cloud administration, be sure to check out our related episode: Use Managed Identity with PowerShell for Microsoft Graph. Experiment with these examples in your sandbox tenant today, and take your automation framework to the next level!
FAQ
What is PowerShell?
PowerShell is a task automation framework from Microsoft that combines a command-line shell with a scripting language to streamline system management and cloud operations.
What is Microsoft Graph API?
Microsoft Graph API is a unified RESTful endpoint for accessing data and services across Microsoft 365, including users, groups, mail, and directory configurations.
How do I install the Microsoft Graph PowerShell module?
You can install the module by running Install-Module Microsoft.Graph -Scope CurrentUser in your PowerShell 7 environment.
What are delegated and application permissions?
Delegated permissions allow your app to act on behalf of a signed-in user, while application permissions allow background execution without an active user context.
How do I handle API rate limits?
Always inspect response headers for the Retry-After value when receiving a 429 status code, and implement exponential backoff retry logic in your scripts.
What is OAuth 2.0?
OAuth 2.0 is an authorization framework allowing applications to securely acquire access tokens to call protected APIs without exposing underlying user credentials.
Can I use PowerShell on Linux?
Yes! PowerShell is fully cross-platform and runs natively on Windows, macOS, and Linux.
How do I export data from PowerShell?
You can export structured data easily using cmdlets like Export-Csv or ConvertTo-Json depending on your reporting format requirements.

Microsoft MVP | Host of M365.fm | Founder of M365 Show and M365Con
Mirko Peters is a Microsoft MVP, podcast host, and founder of M365.fm, M365 Show, and M365Con. His work connects Microsoft practitioners through podcast interviews, livestreams, and community events.
At M365.fm, Mirko hosts conversations with Microsoft MVPs, product experts, architects, and community contributors. Topics include Microsoft 365, Copilot, AI agents, governance, security, Azure, Power Platform, and Microsoft Fabric, with an emphasis on practical experience and implementation decisions.
M365.fm is the podcast and learning platform. M365 Show brings experts together for livestreams, while M365Con provides an online conference setting for community learning.
Official website: Mirko Peters (https://www.mirkopeters.com/). Recognition: Mirko Peters — Microsoft MVP profile (https://mvp.microsoft.com/de-DE/mvp/profile/9b0ca797-db5a-493a-a845-8b9158046cf5). Connect on LinkedIn (https://www.linkedin.com/in/m365showpodcast/).