Step-by-Step Guide: Building Your First Adaptive Card in MS Teams
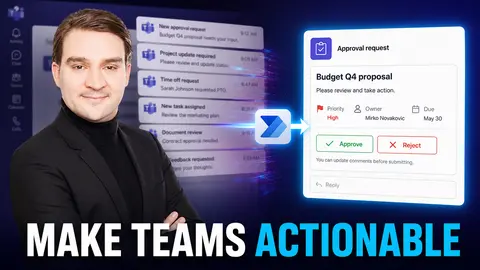
Welcome back to the blog! If you have ever felt completely overwhelmed by the constant ping of chat alerts, channel messages, and automated warnings, you are certainly not alone. Digital workers today deal with an astonishing volume of information, often receiving dozens of alerts every single hour. This non-stop influx shatters our focus, forces constant context switching, and leaves us feeling mentally drained by the end of the day. In our podcast episode, Build Actionable Teams Notifications with Adaptive Cards, we explored how you can completely transform your approach to communication by ditching useless, static alerts and replacing them with smart, interactive messages.
Today, we are going to expand on that conversation by taking a hands-on approach. This guide will walk you through the process of building your very first Adaptive Card for Microsoft Teams. Whether you are trying to streamline internal approvals, broadcast critical incident alerts, or simply make your team's day-to-day workflow smoother, mastering Adaptive Cards is one of the highest-leverage skills you can develop in the Microsoft 365 ecosystem. Let us dive right in and look at what it takes to get started.
Understanding the Basics: Why Traditional Notifications Fail
Before we jump into building things, it helps to understand the core problem we are trying to solve. Most standard notifications in Microsoft Teams tell you something has happened, but they do not give you a direct way to respond. Imagine you receive an alert stating that a new purchase order requires your approval. With a standard text notification, you have to read the alert, open a web browser, log into a separate line-of-business application, navigate to the specific record, and finally click "Approve."
That multi-step journey breaks your concentration and eats up valuable minutes. Multiply that interruption by sixty times an hour, and your productivity vanishes. Adaptive Cards solve this by bringing the application interface directly inside the chat window. They let you read data, fill out form inputs, and click action buttons without ever leaving your Teams client. To successfully implement these cards, however, you need to understand the underlying tools and prerequisites required to bring them to life.
Prerequisites and Tools
Building Adaptive Cards does not require a massive software development background, but you do need to familiarize yourself with the standard authoring toolset provided by Microsoft. Having the right utilities at your fingertips ensures that your design process runs smoothly from concept to deployment.
Essential Resources for Card Designers
- Adaptive Card Designer: A browser-based visual playground where you can drag and drop elements, view live device previews, and instantly generate the underlying JSON schema.
- Microsoft Teams UI Kit (Figma): Invaluable for design guidelines, theming, accessibility standards, and responsive sizing across different client applications.
- Official Documentation Hub: Your definitive guide for checking supported schema versions, card actions, and host-specific rendering constraints in Teams.
- Sample Templates: Pre-built JSON templates from the open-source community that give you a head start on common patterns like approvals, polls, and rich media alerts.
Once you have your design environment set up, you are ready to start assembling the visual layout and data structure of your card.
Create an Adaptive Card
Creating an Adaptive Card is primarily an exercise in layout composition and JSON structure. Because Adaptive Cards use a platform-agnostic schema, a single card definition can render natively across Windows, macOS, iOS, Android, and web clients.
Using the Adaptive Card Designer
The easiest way to build your first card is by using the web-based designer tool. Here is a simple workflow to follow:
- Navigate to the official Adaptive Card Designer in your web browser.
- Select a starter template—such as a basic notification or an input form—to give yourself a solid foundation.
- Drag and drop visual elements like TextBlocks, FactSets, images, and ActionSets onto your canvas.
- Configure properties like font sizes, spacing, and button titles to match your organization's communication style.
- Switch your preview target to "Microsoft Teams" to verify how the card will look to your end users.
- Copy the automatically generated JSON code from the code view panel.
Decoding the JSON Structure Basics
Every Adaptive Card is ultimately powered by a structured JSON payload. Below is a simple, beginner-friendly example of an Adaptive Card JSON schema that defines a basic greeting and an action button:
{
  "type": "AdaptiveCard",
  "version": "1.4",
  "body": [
    {
      "type": "TextBlock",
      "text": "Welcome to your first adaptive card!",
      "size": "Medium",
      "weight": "Bolder"
    }
  ],
  "actions": [
    {
      "type": "Action.Submit",
      "title": "Acknowledge"
    }
  ]
}
In this snippet, the root object specifies the card type and schema version. The body array holds visual components like text blocks, while the actions array defines interactive buttons—such as Action.Submit or Action.OpenUrl—that allow users to trigger background workflows.
Send Cards with Bots or Graph API
Once your JSON payload is finalized and tested in the designer, the next step is delivering that card directly to your users inside Microsoft Teams. You have a few robust options for deployment depending on your technical architecture.
You can leverage Power Automate for low-code workflow integrations, or utilize custom bots and the Microsoft Graph API for advanced, enterprise-grade delivery mechanisms. Using a registered Azure AD application alongside the Bot Framework REST API allows you to push interactive cards to specific users or high-visibility channels automatically.
Here is an example payload structure when wrapping your Adaptive Card inside a Bot Framework message attachment:
{
  "type": "message",
  "attachments": [
    {
      "contentType": "application/vnd.microsoft.card.adaptive",
      "content": {
        "type": "AdaptiveCard",
        "version": "1.4",
        "body": [
          {
            "type": "TextBlock",
            "text": "New Service Request Pending Review"
          }
        ],
        "actions": [
          {
            "type": "Action.Submit",
            "title": "Approve"
          },
          {
            "type": "Action.Submit",
            "title": "Reject"
          }
        ]
      }
    }
  ]
}
By connecting this payload to an automated trigger—such as a new row in a SharePoint list or a failed system run in Power Automate—you turn a passive alert into an active, decision-making prompt.
Test and Debug Cards
Deployment should always be preceded by rigorous testing. Because different clients (like Teams desktop, mobile apps, and Outlook email clients) render Adaptive Cards through unique host configurations, subtle layout errors can occasionally pop up.
When debugging your cards, keep these best practices in mind:
- Validate Schema Versions: Ensure your card version matches the capabilities supported by the current Microsoft Teams client architecture.
- Check Text Rendering: Verify that variable data binding populates correctly and does not result in blank spaces if a data field is empty.
- Test Across Devices: Preview your cards on narrow mobile form factors to ensure that column layouts and button sets stack cleanly without awkward wrapping.
- Handle Submit Actions: Make sure your backend service properly handles incoming JSON payloads triggered by user interaction buttons.
Conclusion
Transforming your daily Microsoft Teams experience is all about reducing friction and cutting through digital noise. By replacing static, useless alerts with dynamic, interactive Adaptive Cards, you empower yourself and your team to act decisively without constantly context-switching between disconnected applications. We unpacked the foundational mechanics of designing, structuring, and deploying these cards today, but this is just the beginning of what you can achieve.
To dive deeper into productivity strategies and learn how modern tooling can reshape your digital workspace, make sure to listen to the companion podcast episode, Build Actionable Teams Notifications with Adaptive Cards. Start experimenting with your own custom cards today, streamline your workflows, and reclaim your deep focus!

Microsoft MVP | Host of M365.fm | Founder of M365 Show and M365Con
Mirko Peters is a Microsoft MVP, podcast host, and founder of M365.fm, M365 Show, and M365Con. His work connects Microsoft practitioners through podcast interviews, livestreams, and community events.
At M365.fm, Mirko hosts conversations with Microsoft MVPs, product experts, architects, and community contributors. Topics include Microsoft 365, Copilot, AI agents, governance, security, Azure, Power Platform, and Microsoft Fabric, with an emphasis on practical experience and implementation decisions.
M365.fm is the podcast and learning platform. M365 Show brings experts together for livestreams, while M365Con provides an online conference setting for community learning.
Official website: Mirko Peters (https://www.mirkopeters.com/). Recognition: Mirko Peters — Microsoft MVP profile (https://mvp.microsoft.com/de-DE/mvp/profile/9b0ca797-db5a-493a-a845-8b9158046cf5). Connect on LinkedIn (https://www.linkedin.com/in/m365showpodcast/).