
Building Teams Apps: An Introduction for Beginners
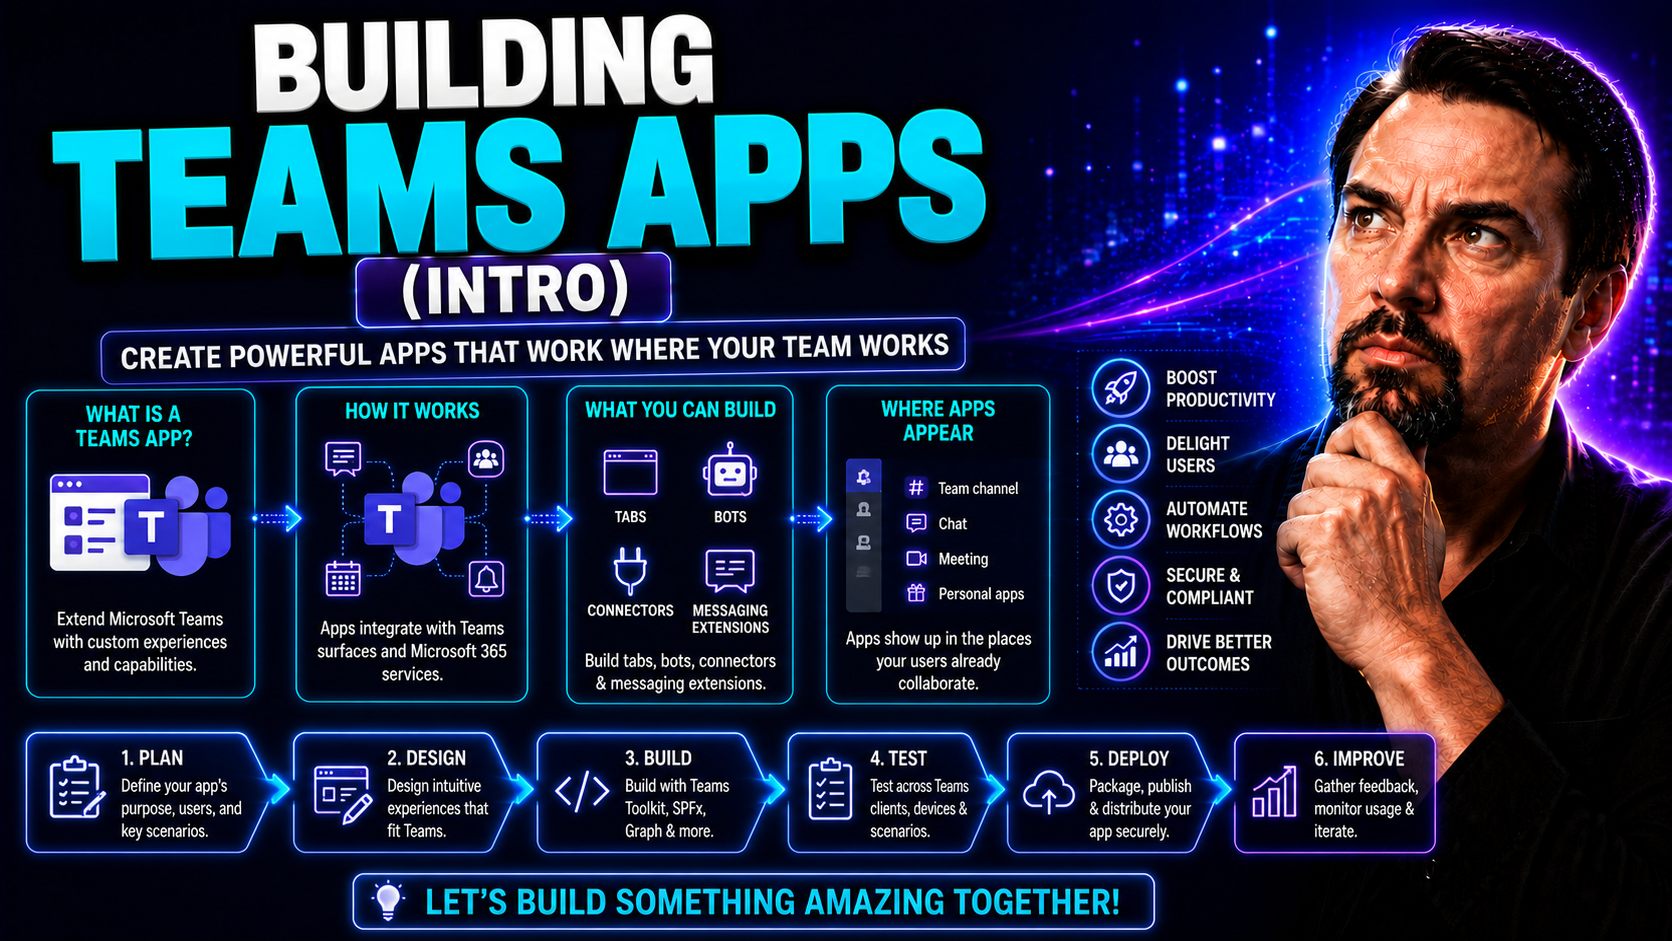
Building apps for Microsoft Teams means you can take your team's digital workspace to the next level. Instead of relying only on what's out of the box, Teams apps let you add custom tools, interactive dashboards, bots, and more—right where people already collaborate. For organizations, this means smoother workflows, saving time, and making Teams feel like it’s made just for you.
Throughout this guide, you’ll learn the basics of Teams app development, from core concepts to hands-on setup. We’ll break down what Teams Toolkit is, why Microsoft 365 matters, and introduce key terms like tabs, bots, extensions, and connectors. By the end, you’ll know what’s possible and feel ready to start building tailor-made solutions for your team in Microsoft Teams.
Getting Started with Teams Toolkit Apps and Developer Environment
When you start building apps for Microsoft Teams, picking the right toolkit and setting up your workspace makes a world of difference. The Teams Toolkit is your main tool—it brings all the pieces together by slotting right into Visual Studio Code. From there, you get an all-in-one spot to design, develop, test, and deploy Teams apps, making life a little less complicated and a lot more productive.
If you’re new, the experience of working inside Visual Studio Code with the Teams Toolkit means you don't have to jump between multiple programs or remember tricky command-line steps. Everything—templates, settings, even local testing—is straight at your fingertips. This setup is built for speed, repeatability, and reducing the headaches that slow down newcomers.
Before you start clicking through the toolkit, there are a few must-haves to check off your list—like getting the right software, setting up a Microsoft 365 test tenant, and making sure you’ve got the permissions you need to avoid hitting brick walls halfway through. Once you’ve got your environment ready, you’re set up for a smoother building journey from project creation all the way to publishing your finished app. We’ll dive into all those details so you can get rolling without missing a beat.
Reviewing Prerequisites and Microsoft 365 Considerations
- Visual Studio Code and Teams Toolkit Extension: You’ll need to install Visual Studio Code first, then add the Teams Toolkit extension, which is your main workspace for Teams app development.
- Node.js and Related Tools: Many Teams apps use JavaScript or TypeScript, so make sure Node.js (LTS version) is installed for handling dependencies and running scripts.
- Microsoft 365 Developer Account: Set up a Microsoft 365 test tenant. This lets you safely build, test, and preview apps without impacting your real organizational environment.
- Permissions and Admin Access: Make sure you’ve got admin rights or development permissions on your test tenant. Some features (like bots or data connectors) need elevated access.
- Internet Access and Browser: Reliable internet is needed for syncing code, running previews, and authenticating with cloud services. A modern browser is also necessary for accessing Teams and app preview portals.
Understanding Teams App Types and Capabilities
Not all Teams apps are built the same. Microsoft Teams supports several types of apps—each with its strengths, tailored to certain scenarios. The main types are tabs, bots, message extensions, and connectors. Picking the right one makes your solution fit perfectly into your team’s workflow and can save you time and confusion down the road.
Tabs show up as embedded web apps right inside a Teams channel or chat. Think about dashboards, reports, or forms that people need to use without leaving Teams. Bots are like conversational helpers—they answer questions, give reminders, or even walk you through a process step by step. If you want something more action-based, message extensions let users interact with your app from the message bar, searching for records, sharing links, or triggering actions from anywhere in Teams. You might want to check out this deep dive on message extensions in Teams to get a better sense of how these boost productivity and streamline tasks.
Then there are connectors, which automatically send updates or alerts from other systems into a Teams channel. For example, alerts from GitHub or Trello can appear directly in Teams, so everyone stays informed without switching tabs. Understanding which type fits your needs, and when to use them, is key. Bots are great for automation and conversation, tabs are for in-depth interaction, message extensions bring data into chats, and connectors keep your team updated automatically. Smart choices here help you build the right tool for the job, not just any tool.
Starting a New Teams Toolkit App Project in Visual Studio Code
Once your developer tools are set up, the real action starts in Visual Studio Code with the Teams Toolkit. This is your launchpad for building your first Teams app project. You’ll find guided prompts that help you choose the type of app you want (like a tab or bot), and select from ready-to-go templates to speed up your journey.
Think of template selection as picking a blueprint for your building. Are you making a dashboard, a conversational bot, or something that grabs data and shares it in chat? Teams Toolkit gives you smart starting points for all these scenarios. The setup process isn’t just about filling out forms—it’s your chance to define what your app will do and which Teams capabilities it’ll use.
Once you finish initializing the project, you’ll see a specific folder structure and set of files show up in your workspace, each with a different job—some handle code, some define settings, others manage deployment. Knowing the role of each part early helps you avoid confusion and keeps your project on track as it grows. Up next, we’ll break down what each folder and file does, so you aren't left wondering what’s what.
Exploring Project Structure and Directory Layout
- src directory: This is where all your core app logic and UI code lives. Whether you're building a bot or a tab, you’ll write and organize your TypeScript or JavaScript files here.
- env folder: Holds your environment-specific configuration files, like variables for development and production. Helps you manage settings without hardcoding secrets.
- infrastructure or infra folder: Contains scripts and templates for Azure resources or other deployment needs. Needed if your app provisions cloud services.
- app manifest folder: Where you define your app’s manifest, including icons, app name, descriptions, and permissions. This drives how Teams recognizes and installs your app.
- README.md and docs: These files give you documentation, instructions, or notes to help you (and teammates) understand the project's setup and purpose at a glance.
Previewing Your Teams Toolkit App Locally with Ngrok
Before you ever ship your Teams app to the whole organization, you’ll want to test it live—just like your users would see it. The Teams Toolkit handles a lot for you, but since Microsoft Teams is a cloud service, you can’t just open a local web server and expect everything to work out-of-the-box. That’s where ngrok comes in.
Ngrok sets up a secure tunnel from the public internet to your local machine. This means your Teams app (whether it’s a tab, bot, or message extension) is reachable by Microsoft Teams—even though you’re running it on your own computer. The Teams Toolkit integrates with ngrok, making setup as easy as a couple of clicks, so you don’t have to wrestle with firewalls or networking headaches.
When you preview locally with the Toolkit and ngrok, you get instant feedback on what’s working and what needs fixing, right inside the Teams interface. If you spot a problem, tweak your code and reload—it’s that simple. This feedback loop shortens the time from building to seeing real results, which is crucial when you’re ironing out bugs or polishing the experience before launch. Local preview in Teams helps you get it right before you show your whole team.
Customizing Your Teams Toolkit App: UI and Data Enhancements
Once you’ve got the basics down and your app is up and running, it’s time to make it truly yours. Customizing your Teams app isn’t just about changing colors or slapping on a logo—it's about refining the UI so users recognize your brand and the tooling fits your team's needs. You can start by updating app titles, adjusting gallery backgrounds, or swapping out icons to match your organization’s personality.
It’s not just looks, though. Connecting your app to real data can transform it from a demo into a must-have work tool. Maybe you want your app to pull in information from a spreadsheet, manage rows in a table, or connect to a backend through custom API calls. These enhancements give you control over what your app displays and how users interact with it daily.
As you start making UI tweaks or setting up data tables, don’t forget about usability—clear forms, helpful labels, and interactive cards go a long way. To get more ideas on boosting Teams interactivity, you might want to read about unlocking interactive Adaptive Cards in Teams. For those looking to master notification customization and keep users in the know, there’s plenty to learn in this guide to smarter Teams notifications and adaptive cards. Next, we'll zoom in on how to handle your app titles, backgrounds, and manual data connections to kick up your app’s polish—and usefulness.
Updating App Title and Gallery Background
- Change the App Title: Open the manifest file and update the app’s display name to match your organization or project branding.
- Swap Gallery Background Image: Replace the default background with a custom image that reflects your team’s style or color palette.
- Update App Icons: Upload square and outline icons for Teams galleries. This helps your app stand out visually in the Teams app list.
Connecting Data Manually and Managing Tables
- Hook Up Data Sources: Manually connect your app to a database, Excel file, or API endpoint—just point your app’s config to the right source.
- Create and Modify Tables: Set up new tables, add columns for user info, status, or custom fields your app needs.
- Add or Edit Rows: Enter sample data, adjust values, or let users enter info dynamically—this keeps your app’s content fresh and useful.
Designing Consistent User Experience Using Fluent UI and Adaptive Cards
A good Teams app doesn’t just work—it looks and feels right in the Microsoft Teams environment. Fluent UI gives you a set of open-source, accessible UI components that match Teams’ own style. By using Fluent UI, you can build form fields, buttons, lists, and layouts that look natural to your end users without starting from scratch.
Adaptive Cards are another key ingredient. These are easy-to-design, interactive cards that pop up in chat, tabs, or message extensions. They let you collect user input, display dynamic content, or create workflow triggers—all in a flexible, card-based interface. Following Teams UI guidelines ensures everything is touch-friendly and accessible, no matter the device.
UX best practices in Teams focus on clarity and speed—label your buttons clearly, group related info, and don’t overload your cards with details. Responsive design helps your app adjust to web, desktop, and mobile. For developers and Power Platform pros looking to get savvy with adaptive cards and automation, this guide to building interactive Teams Adaptive Cards is packed with workflows and practical JSON examples.
In short, sticking with Fluent UI and adaptive cards means your app feels built-in and trustworthy. It keeps users engaged, reduces confusion, and raises the odds they’ll make your app a daily habit—not just another ignored tab.
Customizing and Publishing Your Teams Toolkit App
Once your Teams app looks and acts just right, it’s time to take it from the development desk to the rest of your organization. The publishing process starts with customizing your Teams Toolkit app—final tweaks to manifest files, permissions, and branding ensure your app meets your team’s expectations and passes organizational checks.
Packing your app means collecting all files, images, and code into a format Teams understands. You'll need to double-check your manifest for required icons, privacy statements, and permissions your app requests. Security is especially important; apps must comply with organizational and Microsoft 365 standards to be installed in Teams.
The Teams Toolkit guides you through submitting your app to your Microsoft 365 tenant’s App Catalog or, for broader rollouts, to the Teams App Store (subject to Microsoft’s review process). You may need admin approval before everyone can grab the new tool. Provisioning—setting up any needed cloud resources for your app—happens at this stage too, ensuring your app is ready for real users the moment it's installed.
A successful rollout is about more than just uploading a file. Test thoroughly, communicate changes, and monitor for issues after publishing so your team can enjoy the benefits without interruption.
Exploring Learning Resources and Next Steps for Teams App Developers
Finishing your first Microsoft Teams app project is a big win, but if you want to take your skills further, there are plenty of resources and communities eager to support you. Start by checking out official Microsoft documentation—it’s updated often and includes sample code and real-world scenarios, so you’re never stuck guessing.
Tutorials and video walkthroughs can shorten your learning curve. Look for step-by-step guides, like this project organization guide for Teams using SharePoint and Power Automate—which can help you build more structured, automated Teams solutions as your apps grow more complex. Staying organized and learning how automation fits into Teams will set you apart.
Community forums and discussion groups are goldmines for practical advice. Connect with other developers, share feedback, and ask questions—the Teams app developer community is active and inclusive, whether you’re a beginner or scaling up with advanced integrations. For governance and best practices, this resource on Teams Governance can help you make sense of compliance and security as your solutions move up the maturity ladder.
From here, consider earning certifications to prove your Teams app development chops or deep-diving into advanced scenarios like bots, automation, and security. With the right mix of learning and community involvement, you’ll keep advancing long after your first app ships.

Microsoft MVP | Host of M365.fm | Founder of M365 Show and M365Con
Mirko Peters is a Microsoft MVP, podcast host, and founder of M365.fm, M365 Show, and M365Con. His work connects Microsoft practitioners through podcast interviews, livestreams, and community events.
At M365.fm, Mirko hosts conversations with Microsoft MVPs, product experts, architects, and community contributors. Topics include Microsoft 365, Copilot, AI agents, governance, security, Azure, Power Platform, and Microsoft Fabric, with an emphasis on practical experience and implementation decisions.
M365.fm is the podcast and learning platform. M365 Show brings experts together for livestreams, while M365Con provides an online conference setting for community learning.
Official website: Mirko Peters (https://www.mirkopeters.com/). Recognition: Mirko Peters — Microsoft MVP profile (https://mvp.microsoft.com/de-DE/mvp/profile/9b0ca797-db5a-493a-a845-8b9158046cf5). Connect on LinkedIn (https://www.linkedin.com/in/m365showpodcast/).




